


23 May How to Fix a Torn Speaker Cone Using Rubber Cement and Coffee Filters
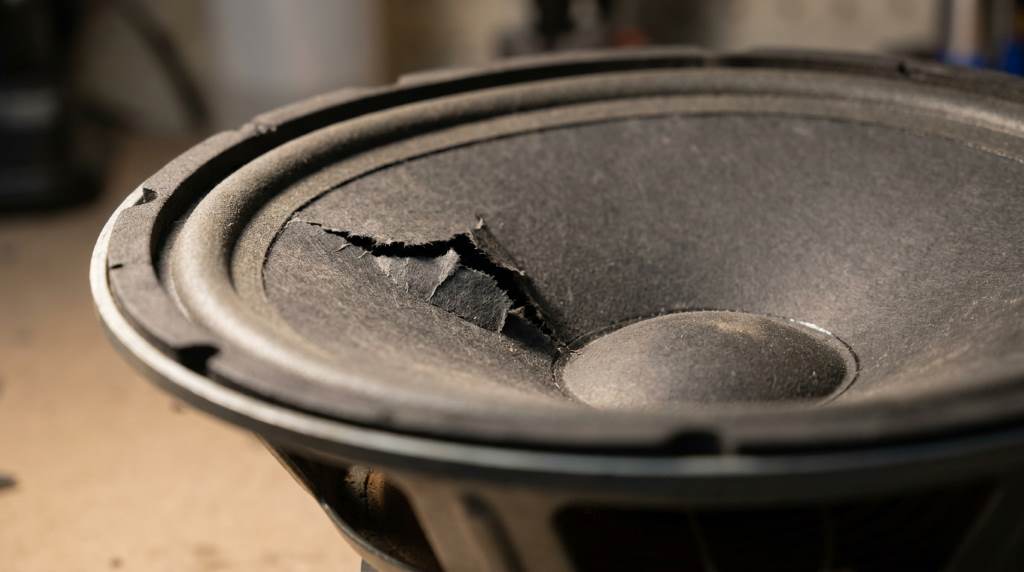
Speaker damage can ruin sound quality faster than most people expect. In fact, many audio repair experts report that small cone tears cause distortion issues in more than 40% of damaged home speakers. Learning how to fix a torn speaker cone using rubber cement and coffee filters can save money and extend the life of your audio equipment. This simple repair method works well for small and medium-sized tears without replacing the entire speaker. Moreover, the process requires affordable tools that most people can find at local stores.
Why Speaker Cones Tear So Easily
Speaker cones move rapidly to create sound waves, so they face constant stress during daily use. Over time, dust, moisture, vibration, and accidental impact can weaken the cone material. In addition, old speakers often become brittle because of age and heat exposure. Many users discover tears after moving speakers or increasing volume too high for long periods.
Small tears may seem harmless at first, but they quickly affect sound clarity and bass response. Distorted audio, buzzing noises, and rattling sounds usually appear when the cone loses structural balance. Therefore, early repair prevents additional damage and helps preserve audio performance. Some repair professionals compare maintenance planning to changing family needs influence long-term decisions because small adjustments today avoid larger expenses later.
Tools Needed for the Repair
Before starting the repair, gather all necessary tools in one place. This preparation makes the process smoother and prevents mistakes during application. Furthermore, clean materials improve the durability of the repair patch. Most supplies cost very little and remain useful for future speaker maintenance.
- Rubber cement
- Plain coffee filters
- Small paintbrush or cotton swab
- Sharp scissors
- Soft microfiber cloth
- Rubbing alcohol
- Flashlight for inspection
Coffee filters work surprisingly well because they remain lightweight and flexible after drying. Unlike thick paper, they do not interfere heavily with cone movement. Rubber cement also stays flexible instead of becoming stiff and brittle over time. As a result, the repaired area can still vibrate naturally with the speaker.
How to Inspect the Speaker Cone Properly
Careful inspection helps determine whether the speaker can be repaired at home. Small tears, punctures, and edge splits usually respond well to the coffee filter method. However, major structural damage or detached cones may require professional replacement. A flashlight helps reveal hidden cracks around the cone edges.
Disconnect the speaker from power before touching any components. Then gently press the cone inward using two fingers placed evenly on opposite sides. If you hear scraping sounds, the voice coil may already be damaged internally. In that situation, cone repair alone may not restore proper audio quality.
Signs the Cone Can Be Repaired
- Small punctures or thin tears
- No burnt smell from the speaker
- Minimal distortion at low volume
- Cone still attached firmly to frame
- No severe dents in the center cap
How to Fix a Torn Speaker Cone Using Rubber Cement and Coffee Filters Step by Step
The repair process requires patience, but it remains simple for beginners. First, place the speaker on a clean and stable surface with proper lighting. Next, wipe dust from the damaged area using a dry microfiber cloth. Dirt and debris can weaken adhesive bonding during the repair.
Cut a coffee filter slightly larger than the torn section. Keep the patch thin and neat so it blends smoothly with the cone surface. Then apply a thin layer of rubber cement around the tear using a cotton swab or small brush. Similar to keeping surfaces protected in smooth and strong asphalt issues prevention methods, even adhesive coverage improves long-term durability.
Place the coffee filter patch carefully over the tear without creating wrinkles. Press gently to remove trapped air and ensure full contact with the cone. Afterward, add another thin layer of rubber cement over the patch. Avoid using excessive glue because thick layers can affect sound movement.
Allow the repair to dry completely for several hours before testing the speaker. Many people rush this stage and accidentally weaken the bond before curing finishes. Once dry, inspect the patch to confirm that all edges remain secure. Finally, reconnect the speaker and test audio at low volume first.
Common Mistakes to Avoid During Speaker Repair
Many first-time repairs fail because users apply too much rubber cement. Thick adhesive layers increase cone weight and reduce sound accuracy. Instead, use light coatings that maintain flexibility and balance. Thin applications also dry faster and create cleaner results.
Another common mistake involves using heavy paper instead of coffee filters. Cardboard, notebook paper, and thick tissue restrict cone movement during playback. Consequently, the speaker may sound muffled or distorted even after repair. Lightweight materials always work best for vibration-sensitive components.
Some people test the speaker before the glue fully cures. This mistake often shifts the patch and reopens the damaged area. Therefore, allow complete drying time before reconnecting power. Patience greatly improves the success rate of this repair method.
Benefits of Using Coffee Filters for Speaker Repair
Coffee filters provide an excellent balance between strength and flexibility. Their lightweight texture supports cone vibration while reinforcing damaged areas effectively. Additionally, they resist tearing better than standard tissue paper during long-term use. Many audio hobbyists prefer them because they remain affordable and easy to shape.
The material also absorbs rubber cement evenly without creating thick hardened spots. Smooth flexibility helps preserve original sound characteristics after the repair. Furthermore, coffee filters blend naturally with many speaker cone textures and colors. Some technicians compare their subtle support role to modern private investigators everyday problem-solving because they quietly strengthen weak points without drawing attention.
How Long Does the Repair Last?
A properly repaired speaker cone can last several years under normal listening conditions. Durability depends on cone size, tear severity, and playback volume after repair. Smaller tears generally hold up much longer than larger structural splits. In many cases, users continue using repaired speakers without noticeable sound loss.
Regular maintenance also improves longevity after completing the repair. Keep speakers away from excessive moisture, heat, and direct sunlight whenever possible. Additionally, avoid pushing speakers beyond their recommended volume range. These simple habits reduce future stress on the repaired section.
When You Should Replace the Speaker Instead
Not every speaker cone responds well to patch repairs. Severe tears that extend across large portions of the cone often reduce sound accuracy permanently. Similarly, damaged voice coils and burnt wiring usually require full replacement. Professional repair costs may also exceed the value of older speakers.
If distortion continues after repair, deeper mechanical issues may exist inside the speaker assembly. Buzzing at low volume often signals voice coil alignment problems rather than cone damage alone. Therefore, testing carefully after repair helps identify whether replacement becomes necessary. Investing in a new speaker sometimes delivers better long-term value.
Tips to Prevent Future Speaker Cone Damage
Proper speaker care significantly lowers the risk of future tears and punctures. First, place speakers in secure locations away from pets, children, and heavy foot traffic. Accidental bumps remain one of the most common causes of cone damage. Protective grilles also help shield delicate surfaces from impact.
Keep audio levels within safe limits during long listening sessions. Constant high-volume playback forces cones to move aggressively and increases stress over time. Moreover, low-quality amplifiers can send distorted signals that strain speaker components unnecessarily. Balanced audio settings improve both performance and lifespan.
Cleaning speakers regularly prevents dust buildup around cone edges and suspension areas. Use a soft brush or microfiber cloth instead of harsh cleaning chemicals. Moisture exposure can weaken paper-based cone materials quickly. Therefore, dry storage conditions remain essential for speaker longevity.
Conclusion
Learning how to fix a torn speaker cone using rubber cement and coffee filters offers an affordable and practical way to restore damaged speakers. This repair method works especially well for minor tears that create buzzing or distorted sound. Moreover, the materials remain inexpensive and easy to use even for beginners. Much like understanding modern private investigators everyday solutions for hidden problems, identifying speaker issues early helps avoid expensive replacements later. Try this repair carefully, follow each step patiently, and bring your speakers back to life with better sound quality today.
FAQs
Can I use regular glue instead of rubber cement?
Regular glue often dries too hard and may reduce speaker flexibility and sound quality.
Do coffee filters really work for speaker repair?
Yes, coffee filters work well because they stay lightweight, flexible, and durable after drying.
How long should rubber cement dry before testing the speaker?
You should wait at least several hours or overnight for the best results.
Will the repair affect sound quality permanently?
A properly repaired small tear usually causes little or no noticeable sound difference.
Can this method fix large speaker cone damage?
This method works best for small and medium tears, but major damage may require replacement.
Sorry, the comment form is closed at this time.